
The MGC homeowner & business guide / Exterior painting
Exterior House Painting: What to Fix Before the First Coat
Look at the surfaces and repair needs before choosing the finish.
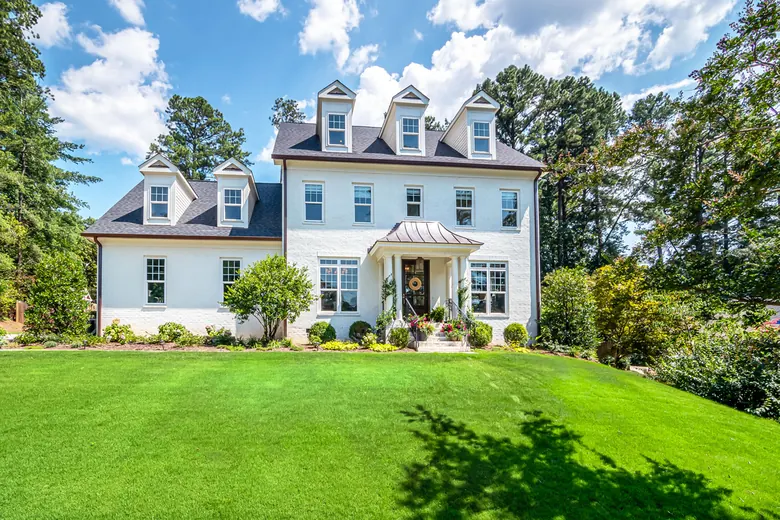
Walk around your house before choosing the new exterior color. The lower edge of a window, a peeling section beneath the roofline, or an open joint in the trim can tell you something useful about the preparation the house needs.
Exterior painting begins with understanding what is already there. New paint needs a suitable surface underneath it, and problems that involve water or damaged materials deserve attention before the finish coats.
You do not need to climb a ladder or diagnose every mark. A few observations from the ground can make the first project conversation much more useful.
Follow the peeling paint back to its cause
Peeling paint is a sign that a coating has lost its bond. Simply covering the loose area does not resolve that condition.
Notice where the peeling occurs. Is it concentrated below a window? Does it follow a seam? Is it limited to one sheltered area, or spread across several surfaces? Take a close-up if you can do so safely, plus a wider photo that shows its location.
Moisture, dirty or glossy surfaces, and poorly attached earlier coatings can contribute to peeling. Sherwin-Williams recommends identifying and repairing water sources and checking the condition of paint around the visibly damaged area. Its peeling-paint guidance explains these causes.
Tell your painter about past leaks, gutter overflows, or sections that have peeled repeatedly. That history can be more useful than the size of the bare spot alone.
Separate damaged materials from surface preparation
Look for cracked trim, loose pieces, visibly deteriorated edges, and gaps that have widened. Photograph what you can see rather than scraping or probing it yourself.
The practical question is whether the area can be prepared for painting or needs a separate repair first. Ask which repairs are included in the painting proposal and which require another step before painting begins.
This avoids an unclear expectation that a fresh coating will correct the shape or condition of damaged material. If another contractor needs to complete work first, establish that sequence before setting the painting schedule.
Three details to inspect outside
Plan cleaning and preparation for the actual surface
Painted wood, masonry, metal, and manufactured siding should not automatically receive identical treatment. The existing coating matters, too.
The preparation plan should identify how dirt and residue will be removed, how loose paint will be addressed, and how the remaining edges will be blended. Glossy surfaces may require additional preparation for adhesion. Primer selection should match the material and the condition exposed after preparation. Benjamin Moore’s exterior-painting guide discusses these differences.
Point out surfaces you want left untouched. A stained door, unpainted stone, or decorative metalwork may sit directly beside an area being repainted. It helps to identify these boundaries while reviewing the house together.
Review failed caulk without assuming every opening needs filling
Cracked or detached caulk around trim and other joints should be assessed as part of preparation. Appropriate repairs depend on the joint, the surrounding material, and the products being used.
Ask where caulk replacement is proposed and how it fits into the primer and paint system. Existing gaps should be evaluated before anyone assumes they all need the same treatment. Sherwin-Williams’ peeling-paint guidance includes removing failed caulk and using a suitable replacement.
The aim is a defined repair plan, with time for materials to dry as directed before coating.
Choose the painting window together
temperature
surface moisture
requirements
All three inform the schedule
Allow for drying and suitable weather
A washed surface is not necessarily ready to paint as soon as the cleaning is finished. It needs to dry sufficiently for the coating being applied.
Weather planning also involves more than a rain-free afternoon. Air temperature, surface temperature, humidity, and the conditions after application can affect the work. A wall in direct sun may be much hotter than the air around it.
Follow the selected product’s label and technical instructions rather than relying on one temperature rule for every exterior paint. Benjamin Moore’s temperature guide explains these variables.
Include protection and access in the plan
Before work begins, agree on access around the house and protection for nearby surfaces. Patio furniture, vehicles, planters, walkways, windows, and landscaping all deserve consideration. BEHR’s exterior-preparation guidance includes clearing the work area and covering items that remain.
For homes built before 1978, address possible lead paint before scraping, sanding, or other disturbance. EPA recommends hiring a lead-safe certified contractor for these projects. Read EPA’s homeowner guidance.
Start with the areas you want painted
MGC Painting provides exterior painting for homes in Gibson Island and Woodbine. We would be happy to discuss the surfaces you want updated and the preparation involved.
Request a free estimate with your project location, the exterior areas you want painted, and photos of any peeling or damaged sections. Include any known water issues so the conversation starts with the condition of your home.
Let’s discuss your project
Start with your home’s exterior.
Tell us the surfaces, condition and timing you have in mind. MGC Painting would be happy to help you plan the next step.